Sparking up Linux
Getting Linux up and running on your Sun machine
August 1998
|
|
Sparking up LinuxGetting Linux up and running on your Sun machine
|
August 1998 |
Following on from Rick Cook's January SunWorld article, "Linux lines up for the enterprise," this first of two parts focuses on Linux download and installation issues for SPARC machines. For those of you living on the bleeding edge, John will cover UltraSPARC and other advanced topics next month. (3,500 words, including one sidebar on using serial console devices)
|
Mail this article to a friend |
Even if Linux is being taken seriously as a server operating system, it's still generally thought of as an Intel platform. However, thanks to a small, dedicated band of developers, a SPARC version of Linux has, in fact, been available for several years now. The first bundled CD-ROM distribution came out with Red Hat 4.0 in the fall of 1996. Since then, work has continued steadily, with improvements, fixes, and developments coming out on a regular basis. A solid connection with the x86 development effort -- and the active involvement of Linus Torvalds himself with the Intel, Alpha, and SPARC ports -- means that the SPARC code tracks the changes and innovations in the main kernel and remains recognizably Linux, despite the differences in architectures.
And now, with Sun's recent Linux conversion, SPARC ports of Linux should move a lot more quickly and smoothly, says Red Hat Marketing Director Lisa Sullivan. "In the past," she notes, "we've had some issues with the SPARC version of Linux. With Sun's help, we will be able to make sure that Sun's versions stay in line with our other versions [i.e., Intel and Alpha]."
|
|
Linux on SPARC: A Unix by any other name
From the perspective of a SunOS or Solaris user, how does
Linux for SPARC fit into the scheme of things?
Strictly speaking, Linux isn't Unix. It's a Unix-like OS. And since the code is based on neither BSD (Berkeley Software Distribution) or SVR4 (System V Release 4), it tends to defy classification. On the one hand, loadable kernel modules, a /proc filesystem, and an /etc/rc.d directory structure create a more than passing resemblance to Solaris. On the other, features like the /dev directory structure and the BSD-style printer daemon are more reminiscent of the SunOS. To add to the confusion, SPARC-based Linux occasionally shows its PC heritage with programs such as fdisk (a disk partitioning utility). Its nonconformist background is evident in the incorporation of novel features such as virtual consoles and mouse-based cut and paste outside of the X Window System. While this diversity is one of the true strengths of Linux, it can also be a little intimidating to the newcomer.
Red Hat 4.2
Three complete, working releases of Linux for SPARC are currently
available -- though at the time of writing, only one is readily available
on CD-ROM. This release, version 4.2 from Red Hat Software,
provides support for Sun4C and Sun4M architecture desktop systems (to find out what architecture you have, type uname -m) and is the one I will refer to for the bulk of
this article. It's worth
noting that several non-desktop machines, such as the 4/600 series, will
also run 4.2 when using the on-board SCSI, but there's no support for
VersaModule Eurocard (VME)-based devices in this release,
so VME-bus machines aren't included in Red Hat's official support list.
If you purchased Red Hat Linux 5.1 for SPARC on CD recently, you should probably read my article on the Sun4C bug.
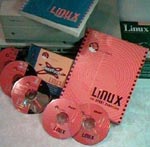
Red Hat Linux for SPARC |
The standard boxed release of Red Hat Linux 4.2 for SPARC comes with two CD-ROMs (one a bootable install CD, the other containing complete source code), a 250-page, soft-cover user's guide, and a limited (30-day) support agreement.
If you decide to go out shopping for SPARC-based Linux, though, keep an eye out for Red Hat's Summer '97 4.2 PowerTools compilation set. With SPARC, Intel, and Alpha distributions as well as extra bundled applications, all on six CDs, this release gets my vote for the Linux bargain of the decade.
UltraPenguin
A separate release for the Sun4U Ultra-1 and Ultra-2 desktop systems
has also been available via the Net since July of last year. With
the unlikely name UltraPenguin, this version has a true 64-bit
kernel with full support for 32-bit binaries. Unfortunately, it has
never been distributed on bootable CD-ROM media.
UltraPenguin 1.0.9
In the up-and-coming department, a new version of UltraPenguin -- providing
integrated support for Sun4C, Sun4M, and Sun4U machines -- is now in late
beta. In addition to Ultra-1 and Ultra-2 systems, this version also has
support for the newer, PCI-based machines, including the Ultra-5. It
isn't available on CD-ROM yet, but this version is rumored to be the one
Red Hat will use for its next (5.1) release of Linux for SPARC.
CD-ROM installs
There are three basic methods of booting your system into the actual
install program: CD-ROM, floppy, or the network. If you
purchase the CD-ROM distribution, a simple boot cdrom command is obviously
the most straightforward.
However, most people who are trying Linux for the first time download it
from the Net, in which case they must use one of the other methods.
Floppy boot
Booting from a floppy isn't familiar to most Sun users, but it can be
useful when you're trying to boot a system that isn't connected to a network and
doesn't have a Sun-compatible CD-ROM drive attached. Making boot floppies is quite
simple. The boot images are available both on the CD-ROM distributions and on the FTP
sites under the directory redhat-4.2/sparc/images (see Resources, below, for FTP site URLs). You can create boot
floppies under SunOS, Solaris, Linux, or even DOS. The main requirement is that you
have a known good, formatted diskette before you start. Use dd to
transfer the boot image file onto the diskette, followed by bfd() or
boot floppy, depending upon the PROM revision of your SPARC. One word of
warning here: the earlier 4.0 and 4.1 releases from Red Hat had problems with the floppy image,
causing machines with pre-2.0 boot PROMs to fail with a read error
message. So always make sure you download the latest diskette boot image from the 4.2 tree.
With both the CD-ROM and floppy boots, the first message you see
will be Uncompressing image, demonstrating yet another Linux foible:
the compressed kernel. Although originally developed to save precious
space on boot floppies, this peculiarity has been carried over into
mainstream Linux. Even in cases such as a CD-ROM distribution, where
space isn't such an issue, compressed kernels have become the norm. Your
system will still boot (and boot a smidgen faster at that) if the kernel
image isn't compressed.
Network boot
Configuring a second machine on your network as a boot server for
SPARC-based Linux is also quite simple. This machine needs only enough free
space for a single network boot image -- about 2.5 megabytes (MB) --
and, as the target
system uses it only once (at installation boot time), it doesn't need to be
permanently dedicated to the task. Be careful though: If you already
have diskless or AutoClient systems on your network, it's best to use
the existing boot server for SPARC-based Linux too -- otherwise your existing
clients may hang. Suns expect the machine that answers the initial
RARP (Reverse Address Resolution Protocol) broadcast to be able to serve
the kernel boot-file, too. Setting up an additional boot server on a busy
production network in these circumstances will probably earn you a pink slip
just as soon as one of the original clients tries to reboot.
The setup for network booting will look very familiar. The configuration of the tftp daemon in /etc/inetd.conf and the creation of a tftpboot directory (if one doesn't already exist) are all exactly the same as under Solaris. The Linux tftpboot image file is placed in the tftpboot directory and the standard link is created between it and a filename with the format <HEX-IP-ADDRESS>.<ARCH>. One difference here is that the Linux kernel is architecture-independent between Sun4C and Sun4M machines, so there is only one tftpboot.img file supplied with Red Hat 4.2. In the case of a SPARCstation-2 client, with an IP address of 172.17.172.51, the link would look like this:
AC11AC33.SUN4C -> tftpboot.img
And for a Classic with the IP address, 172.17.172.58:
AC11AC3A.SUN4M -> tftpboot.img
If you're not sure which architecture your client machine has, you can create both Sun4C and Sun4M links. Be sure your client system's Ethernet address and hostname are in the ethers map too, otherwise its initial RARP request will fail (ARP/RARP timeout). After these preparations, booting is a simple matter, using ble() or boot net (again, depending upon the PROM revision of your machine).
Whether booting from CD-ROM, floppy, or the network, the initial stages are the same. The console will switch to inverse video and a color bitmap of Tux the penguin (the Linux mascot) will appear before kernel messages begin to scroll down the screen. Among other differences, note that the Linux messages identify whether your SCSI devices are SCSI-I or SCSI-II compliant.
Serial console devices
Serial terminals can be a little confusing to us Sun users, as we expect
them to "just work." The two situations that require a little extra
attention when using Linux on SPARC are (1) installations using a serial terminal and (2) the conversion of a working machine from a graphics to a serial
console. In both cases, SPARC-based Linux needs to be told specifically which
physical device is to be utilized as the console.
For an install using a serial terminal, you need to specify the extra argument, serial, at boot time. Thus, a boot from CD-ROM would be
ok boot cdrom linux serial
During the boot sequence, you'll notice that a message specifying a change to serial-console mode is displayed. From that point on, the rest of the install will be tailored to a serial terminal console device (releases of Red Hat previous to 4.2 didn't have this feature).
The biggest differences are a lack of color and a lack of virtual console
devices. Despite not being able to make use of virtual consoles, you
can get an interactive shell at any time using Control-Z. To get back into
the install program where you left off, simply type exit to
the shell.
For information on converting a bitmap-console machine to a serial console, see the Serial console sidebar.
| PROM monitor boot commands | |
|---|---|
boot xxxx linux |
Normal boot. |
boot xxxx linux serial |
Console on Port-A/B. |
boot xxxx linux single |
Single user. |
boot xxxx linux single serial |
Single user, serial console. |
boot floppy linux rescue |
Minimum shell from floppy. |
boot floppy linux rescue serial |
Minimum shell, serial console. |
boot xxxx linux root=/dev/sda1 |
Force root mount on first partition of first SCSI disk. |
boot xxxx linux init=/bin/sh |
Force system to ignore rc.d/init.d and drop directly into shell. |
| Ensuring reliable reboots (NVRAM settings) | |
setenv sunmon-compat? false |
Force system to reset to Forth mode. |
setenv boot-file linux |
Ensure the system boots the Linux kernel. |
setenv auto-boot? true |
Ensure that the system will reboot when unattended. |
Install basics: Before you start
How much disk space will you need to install Linux on SPARC?
The smallest useful installation (the base package plus networking) is lightweight -- 35 MB or so -- which means it's quite possible to use an old 105-MB disk for a quick and easy trial installation. A compact, usable, desktop configuration can be squeezed onto a 207-MB disk without too much trouble Table 2, "Install sizes and times" for more information on install times and space requirements).
Virtual consoles
Linux supports virtual console devices. If you're using the normal
bitmapped Sun screen and keyboard you can access these alternate
displays by holding down the Alt key and selecting the screen using
F1 through F6. Under the Red Hat install program, the virtual
consoles are dedicated to specific tasks.
Red Hat Linux for SPARC installation dialog box |
In normal operation, outside of the install program, each virtual console will provide a login prompt and will also display console stderr messages.
Navigation
Most install screens use Tab to move between items and Enter to select.
Highlighting the Cancel button will usually allow you to return to the
previous step. The keyboard arrow keys work in multichoice menus, too.
The Shell
The default shell under Linux is bash, the Bourne-again shell. While
history and command substitution are similar in most respects to the csh,
variables are set and for-while loops are defined using Bourne shell syntax.
Bash uses the GNU readline library to provide extensive command-line
editing capability combined with history (use the arrow keys to move around
in history and edit individual command lines).
The Install program
The install program itself will look vaguely familiar, in that it is a
cursor-based, menu-driven program, with a package selection section and
a horizontal bar graph to indicate install progress. The most noticeable
difference between the Linux install and the Solaris version is that
Linux uses color.
If you didn't boot from CD-ROM, one of the first choices you must make is which media type you intend to install from. In this respect Red Hat Linux is very versatile. Starting from a floppy or network boot, it is possible to install in three ways: from a package tree on a local CD-ROM or hard disk, via NFS (Network File System), or even via FTP from behind a firewall. This last option makes it feasible to use the Red Hat FTP site (or one of the mirrors) as the install source. In practice, however, the probability of dropped connections or timeouts makes this much too unreliable (unless you happen to have a very fast Internet connection and know of an under-used mirror site). FTP is still a valid option where the install packages are on a remote system and cannot be exported via NFS, though.
fdisk
The next task after choosing the install source is to choose and partition
a target disk. As mentioned earlier, the Linux fdisk program is useful
only as a partitioner, so any disk you want to use must already
have been formatted.
The fdisk utility can sometimes be a little temperamental. When it doesn't find anything recognizable as a valid label at start-up, it will usually exit without warning on receipt of any command other than s (create Sun label). Entering s as the very first command will ensure that a compatible label is written to the disk, which you can then edit to your own requirements.
In Sun tradition (and unlike other Linuxes), SPARC-based Linux requires that slice 3 of the partition table be the whole disk. The default label written by the s command will have slices 1 and 2 defined in addition to this. Slice 2 will be a 50-MB swap partition and slice 1 will be a single filesystem using the rest of the available space. As 50 MB of swap is more than generous for most user configurations, you might want to consider reducing this amount -- by as much as half if you're doing a trial installation on a small disk.
The install program requires that some swap is configured. Upon exiting the fdisk utility it will ask for confirmation before initializing and bringing the specified partition into use.
Package selection
The package selection section is quite straightforward, with one exception
(in revision 4.2, anyway). The Install Everything option is,
illogically, out of sight at the very bottom of the selection menu
at start-up. Red Hat Software has otherwise put together a very
serviceable set of package groupings to make installation as simple as
possible for the widest possible user base. If you don't like the provided
groupings, it is also relatively easy to go into a submenu and select
individual packages yourself.
However, a definite shortcoming of the package selection process is that it doesn't check available disk space before starting off the actual install. This can lead to frustrating, last-minute failures toward the end of the install process, as the disk becomes full. Check the table below for approximate sizes and install times for major package groupings. If in doubt, install a minimal system and use Red Hat's package manager, rpm (or glint, the GUI version) to add new packages as you need them.
| Install sizes and times | |||||
|---|---|---|---|---|---|
| Mini | Server | Wkstn | Full | Full with PowerTools |
|
| Base (selected by default) | X | X | X | X | X |
| C, C++ | X | X | X | X | |
| Development Libraries | X | X | X | ||
| Printer Support | X | X | X | X | |
| NFS, networked workstation, dial-up, DOS connection |
X | X | X | X | X |
| anonymous FTP, Web, news | X | X | X | X | |
| X, multimedia, Java | X | X | X | ||
| TeX, Emacs | X | X | |||
| PowerTools | X | ||||
| Approx Install Minutes | 10 | 15 | 25 | 60 | 85 |
| Approx Install MB | 35 | 50 | 150 | 440 | 560 |
Finishing the install
After the successful addition of the selected packages, the install program
will prompt for basic information about system configuration. Two specific areas
are a little confusing to the novice.
The first comes up during timezone selection. The first choice on the menu is
Hardware clock set to GMT. Unless you actually live on the Greenwich
meridian (or enjoy fiddling with timezone settings) I'd advise leaving
this box unchecked. Do select your timezone, though. This is also one
of the sections where those rarely-used page-up and page-down keys can save
lots of time and effort (the timezone list is quite long).
The last and most important configuration section is perhaps the most confusing. This deals with the installation of the bootblock on your Linux disk. It might seem that the installation of a bootblock would be so basic as to be mandatory, but it isn't. Linux has the capability to share a disk with another OS, and the boot manager (in the x86 distribution this is called LILO, for Linux Loader; under SPARC, it's called SILO) is capable of booting other operating systems too. So, you're given the choice of bypassing this step or adding extra configuration parameters.
Unless you're already a SILO expert, when prompted with:
Would you like to install or configure the SILO bootloader on your system?
You should select Yes and then leave the next section, configuration
parameters, blank. This will install the default bootblock onto your disk.
So far, I've covered the installation process for SPARC-based Linux
4.2 on Sun4C and Sun4M architecture machines. Next month I'll delve into kernel
upgrades, installs on the Ultra, running applications in emulation mode, and
setting up SPARC-based Linux X terminals.
![]()
|
|
Resources
About the author
John Little is an Englishman living in Japan and working for an
American company (he frequently uses these facts when attempting
to excuse his grammar and spelling). He worked for Sun Microsystems
for nine years.
Reach John at john.little@sunworld.com.
|
|
|
|
If you have technical problems with this magazine, contact webmaster@sunworld.com
URL: http://www.sunworld.com/swol-08-1998/swol-08-linuxsparc.html
Last modified:
![]()
![]()
setconsole
If you still have access to the Sun keyboard and display, or if the
machine is still running and you can log into it across the network,
this is relatively simple. The setconsole script provided by Red Hat
will modify the /etc/inittab file and the /dev links to point at the
specified device. To specify serial port-A as the console device, use:
setconsole ttya
To reset things back to using the Sun frame buffer and keyboard:
setconsole video
Reboot the system in its new configuration.
If you're changing from a graphics to a serial console, you'll notice the following message during the boot:
gpm: is your kernel compiled with CONFIG_SELECTION on?
This is from the General Purpose Mouse server (the program that provides cut and paste in virtual console windows) expressing its surprise at not being able to access a mouse. If you intend to make the serial console permanent, you might also want to modify /etc/rc.d/init.d/gpm to inhibit start-up of this program.
Manual conversion
An unconverted, headless system requires more work. Attach your serial
console and force Linux to boot into a shell (instead of running init)
using the following boot syntax:
ok boot linux init=/bin/bash
You might see the error message from the shell, too many arguments
(which it's safe to ignore) and then you'll find yourself at a
shell prompt. At this point, only the root filesystem is mounted,
and read-only at that, so you'll need to do a little preparatory work
before starting on the actual configuration change.
/sbin/fsck /
/sbin/mount -n -o remount /
TERM=vt102; export TERM
The fsck command requires no explanation. The mount line remounts the root filesystem read/write, without updating /etc/mtab (-n), and the last line sets the terminal to a recognizable type (the vt102 might need to be changed to suit your actual terminal or emulator's characteristics).
Following this set-up work, you can now vi the /etc/inittab file to reflect the new status of your machine as a serial-console, headless server. Because the serial terminal will not support virtual consoles, the getty processes for them (lines 2 through 6, below) must be disabled. Also, because the default mingetty (minimal getty) doesn't handle disparate terminal types or line speeds, the new specifier for your serial terminal should specify the standard getty program as the one to use.
The changes to /etc/inittab are shown below.
Original lines from /etc/inittab
# Run gettys in standard runlevels
1:12345:respawn:/sbin/mingetty tty1
2:2345:respawn:/sbin/mingetty tty2
3:2345:respawn:/sbin/mingetty tty3
4:2345:respawn:/sbin/mingetty tty4
5:2345:respawn:/sbin/mingetty tty5
6:2345:respawn:/sbin/mingetty tty6
Replacement lines in /etc/inittab
# Run gettys in standard runlevels
##1:12345:respawn:/sbin/mingetty tty1
##2:2345:respawn:/sbin/mingetty tty2
##3:2345:respawn:/sbin/mingetty tty3
##4:2345:respawn:/sbin/mingetty tty4
##5:2345:respawn:/sbin/mingetty tty5
##6:2345:respawn:/sbin/mingetty tty6

#
# Serial console, 9600 baud on Port-A.
#
1:12345:respawn:/sbin/getty ttyS0 DT9600 vt102
In addition to this, links need to be made in the /dev directory to make sure that the console points at the A-port.
cd /dev
rm console
rm systty

ln -s ttyS0 console
ln -s ttyS0 systty
You must also add the port name ttyS0 into the /etc/securetty file to allow root logins on that device.