This chapter shows you the steps to follow to create a distributed version of the classic Hello World program using Java Remote Method Invocation (RMI).
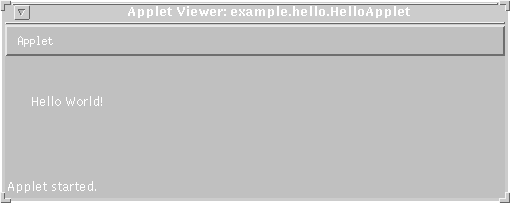
The distributed Hello World example uses an applet to make a remote method call to the server from which it was downloaded to retrieve the message "Hello World!". When the applet runs, the message is displayed on the client.
To accomplish this, you will work through the following three lessons:
examples.hello and the root
directory is $HOME/jdk1.1/mysrc/examples/hello.
For example, to create the directory for your source files on Solaris, execute this command:
mkdir $HOME/jdk1.1/mysrc/examples/hello
java.rmi.Remote.
java.rmi.RemoteException in its throws
clause, in addition to any application-specific exceptions.
sayHello, which returns a string to the caller:
package examples.hello;
public interface Hello extends java.rmi.Remote {
	String sayHello() throws java.rmi.RemoteException;
}
HelloImpl.java file, which contains
the code for the Hello World server. The code is followed by an explanation of
each of the preceding six steps.
package examples.hello;

import java.rmi.*;
import java.rmi.server.UnicastRemoteObject;

public class HelloImpl
	extends UnicastRemoteObject
	implements Hello
{
	private String name;

	public HelloImpl(String s) throws RemoteException {
		super();
		name = s;
	}

	public String sayHello() throws RemoteException {
		return  "Hello World!";
	}
	public static void main(String args[])
	{
		// Create and install a security manager
		System.setSecurityManager(new RMISecurityManager());

		try {
			HelloImpl obj = new HelloImpl("HelloServer");
			Naming.rebind("//myhost/HelloServer", obj);
			System.out.println("HelloServer bound in registry");
		} catch (Exception e) {
			System.out.println("HelloImpl err: " + e.getMessage());
			e.printStackTrace();
		}
	}
}
HelloImpl. An
implementation class specifies the remote interface(s) it is implementing.
Optionally, it can indicate the remote server that it is extending, which in this
example is java.rmi.server.UnicastRemoteObject. Here is the
HelloImpl class declaration:
public class HelloImpl
	implements Hello
	extends java.rmi.server.UnicastRemoteObject
UnicastRemoteObject indicates that the HelloImpl class is used
to create a single (nonreplicated) remote object that uses RMI's default sockets-
based transport for communication. If you choose to extend a remote object
from a nonremote class, you need to explicitly export the remote object by
calling the method UnicastRemoteObject.exportObject.
Here is the constructor for the HelloImpl class, which initializes the private
string variable name with the name of the remote object:
private String name;
public HelloImpl(String s) throws java.rmi.RemoteException {
	super();
	name = s;
}
super method call invokes the no-arg constructor of
java.rmi.server.UnicastRemoteObject, which "exports" the remote
object by listening for incoming calls to the remote object on an anonymous
port.
java.rmi.RemoteException, because RMI's
attempt to export a remote object during construction might fail if
communication resources are not available.
super no-arg constructor occurs by default if omitted,
it is included in this example to make clear the fact that Java constructs the
superclass before the class.
For example, here is the implementation for the sayHello method, which
returns the string Hello World! to the caller.
public String sayHello() throws RemoteException {
	return  "Hello World!";
}
java.io.Serializable. Most of the core Java classes in java.lang and
java.util implement the Serializable interface.
main method of the service first needs to create and install a security
manager: either the RMISecurityManager or one that you have defined
yourself. For example:
System.setSecurityManager(new RMISecurityManager());
main method of the service needs to create one or more instances of the
remote object which provides the service. For example:
HelloImpl obj = new HelloImpl("HelloServer");
For bootstrapping, the RMI system also provides a URL-based registry that
allows you to bind a URL of the form //host/objectname to the remote
object, where objectname is a simple string name. Once a remote object is
registered on the server, callers can look up the object by name, obtain a remote
object reference, and then remotely invoke methods on the object.
For example, the following code binds the URL of the remote object named
HelloServer to a reference for the remote object:
Naming.rebind("//myhost/HelloServer", obj);
obj argument. Remote
implementation objects like instances of HelloImpl never leave the virtual
machine where they are created, so when a client performs a lookup in a
server's remote object registry, a reference to the stub is returned.
sayHello method in order to get the string "Hello World!",
which is displayed when the applet runs. Here is the code for the applet:
package examples.hello;

import java.awt.*;
import java.rmi.*;

public class HelloApplet extends java.applet.Applet {
	String message = "";
	public void init() {
		try {
			Hello obj = (Hello)Naming.lookup("//" +
				getCodeBase().getHost() + "/HelloServer");
			message = obj.sayHello();
		} catch (Exception e) {
			System.out.println("HelloApplet exception: " +
				e.getMessage());
			e.printStackTrace();
		}
	}
	public void paint(Graphics g) {
		g.drawString(message, 25, 50);
	}
}
getCodeBase method in
conjunction with the getHost method.
sayHello method of the HelloServer
remote object and stores the return value from the call (the string "Hello
World!") in a variable named message.
paint method to draw the applet on the display,
causing the string "Hello World!" to be displayed.
AppletSecurityManager will
throw an exception since the applet cannot access the local system, but is
instead limited to communicating only with the applet host.
<HTML>
<title>Hello World</title>
<center> <h1>Hello World</h1> </center>

The message from the HelloServer is:
<p>
<applet codebase="../.."
	code="examples.hello.HelloApplet"
	width=500 height=120>
</applet>
</HTML>
codebase attribute indicates the
URL, as shown here:
codebase="../.."The codebase in this example specifies a directory two levels above the directory from which the web page was itself loaded. Using this kind of relative path is usually a good idea.
code attribute specifies the fully package-qualified name of the
applet, in this example examples.hello.HelloApplet:
$HOME/jdk1.1/mysrc/hello directory has four files:
Hello.java, which contains the source code for the Hello remote interface.
HelloImpl.java, which is the source code for the HelloImpl remote object
implementation, the server for the Hello World applet.
HelloApplet.java, which is the source code for the applet.
index.html, which is the web page that references the Hello World applet.
.java source files to create .class files. You
then run the rmic compiler to create stubs and skeletons. A stub is a client-
side proxy for a remote object which forwards RMI calls to the server-side
skeleton, which in turn forwards the call to the actual remote object
implementation.
When you use the javac and rmic compilers, you must specify where the
resulting class files should reside. For applets, all files should be in the applet's
codebase directory. In this chapter, this is $HOME/public_html/codebase.
Some Web servers allow accessing a user's public_html directory via an HTTP URL constructed as "http://host/~username/". If your Web server does not support this convention, you may use a file URL of the form "file://home/username/public_html".
$HOME/public_html/codebase
and the development directory $HOME/jdk1.1/mysrc/examples/hello are
each visible via the local CLASSPATH on the development machine.
To compile the Java source files, run the javac command as follows:
javac -d $HOME/public_html/codebase
	Hello.java HelloImpl.java HelloApplet.java
examples/hello (if it does not already
exist) in the directory $HOME/public_html/codebase. The command then
writes to that directory the files Hello.class, HelloImpl.class, and
HelloApplet.class. These are the remote interface, the server, and the
applet respectively.
rmic compiler on the names of
compiled class files that contain remote object implementations. rmic takes
one or more class names as input and produces as output class files of the form
myImpl_Skel.class and myImpl_Stub.class.
For example, to create the stub and skeleton for the HelloImpl remote object
implementation, run rmic like this:
rmic -d $HOME/public_html/codebase examples.hello.HelloImpl
-d option indicates the root directory in which to place the compiled stub
and skeleton files. So the preceding command creates the following files in the
directory $HOME/public_html/codebase/examples/hello:
HelloImpl_Stub.class
HelloImpl_Skel.class
index.html file must be moved from the development directory to the
codebase directory. For example:
mv $HOME/jdk1.1/mysrc/examples/hello/index.html
	$HOME/public_html/codebase/examples/hello
HOME/public_html/codebase directory is available via
the server's local CLASSPATH when you run the HelloImpl server.
To start the registry on the server, execute the rmiregistry command. This
command produces no output and is typically run in the background. For
example, on Windows 95 or Windows NT:
start rmiregistry
javaw if start is not available.)
And on Solaris:
rmiregistry &
start rmiregistry 2001
java.rmi.Naming class
when making calls to the registry. For example, if the registry is running on
port 2001 in the Hello World example, here is the call required to bind the URL
of the HelloServer to the remote object reference:
Naming.rebind("//myhost:2001/HelloServer", obj);
<PARAM name="url" value="//myhost:2001/HelloServer">
java.rmi.server.codebase property must be
specified, so that references to the remote objects created by the server can
include the URL from which the stub class can be dynamically downloaded to
the client.
The following command shows how to start the HelloImpl server, specifying this property:
java -Djava.rmi.server.codebase=http://myhost/~myusrname/codebase/
	examples.hello.HelloImpl &
/ in the codebase URL must be specified.
A stub class is dynamically loaded into a client's virtual machine only when the class is not already available locally.
appletviewer
	http://myhost/~myusrname/codebase/examples/hello/index.html &